Dinner Napkins

We love so many colors and really wanted to find ways to incorporate a range of colors. So, I'm making our dinner napkisn out of prints. Mostly, they reflect our main colors (Mossy Green, Navy Blue, Light Blue) but also give a glimmer of others. I like the overall vibe that it'll give off for our reception.
Clutch Favors for Bridal Shower Guests
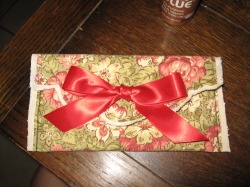
The original inspiration came from an idea I found on Martha Stewart Weddings (http://www.marthastewartweddings.com/article/lace-clutch-clip-art) but I didn't care for the clip art patterns they had available. Instead, I chose to pick out my own fabric, sew it atop some ivory cotton canvas and followed the rest of the directions. Also, rather than punching a hole through the top flap, I sewed a button hole and used a seam ripper to open up the slit. As a final touch, I used tacky glue (all-purpose) to seal off all the ends of the fabric in order to keep the threads from unraveling.
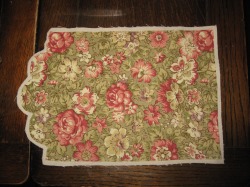
1. Following the pattern from Martha Stewart Weddings, I cut out the fabric of choice.
2. I laid the original piece over ivory cotton canvas and cut out a matching piece of fabric just a tad wider (a little more than a 1/4")
2. I laid the original piece over ivory cotton canvas and cut out a matching piece of fabric just a tad wider (a little more than a 1/4")
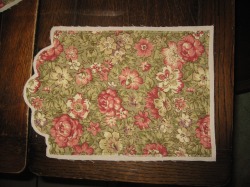
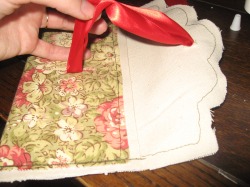
You can't tell in this photo, but this is post stitching. I sewed a border around the printed fabric to secure it to the canvas beneath. Using darker thread than the ivory can be really fun. I like slightly awkward, unique looks to things. It gives a little bit of a folky and fun feel to it.
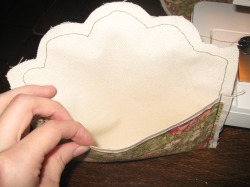
The inside. My Bridesmaids and I will be placing small thank you cards for the ladies inside here. I've toyed with the idea of printing the date of our wedding at the head of the top scallop but haven't totally decided yet.
1. Sew a button hole using sewing machine and rip open slit between threads using a seam ripper. OR, puncture a hole like in the Martha Stewart directions. OR, cut a slit using scissors. I prefer sewing a button hole although I tried the other options as well. The only way I found to make them look as nice as the button hole technique, is to to use Tacky Glue to seal off any possible loose threads.
2. Using needle and tread, stitch ribbon to the front flap. I started out using Stewart's recommended 20" but found that I liked a smaller, dainty bow and now use about 15" of ribbon.
2. Using needle and tread, stitch ribbon to the front flap. I started out using Stewart's recommended 20" but found that I liked a smaller, dainty bow and now use about 15" of ribbon.
Our Invitations
Some of this would fit in perfectly under the "paper stuff" tab, but since the actual, physical invitation was made from linen, I decided to list it here. Our inspiration for our invitations came from, I believe, a Simple magazine- Wedding edition, where a bride had used an HP InkJet printer to print directly on some vintage handkerchiefs. Since I didn't have a collection of 80-some odd vintage hankies, we decided to make our own.
Here's how it happened:
1. I bought pure, white linen and cut it down to size (about 8x9). The HP InkJet printer we used would take no larger than the standard 8 1/2 x 11" size. My lovely Fiance cut took a roll of freezer paper and cut out sheets of 8 1/2 x 11". We ironed the linen to the sticky side of the freezer paper. After designing our invitations on the computer, we fed our pages of freezer paper & linen through the printer one at a time. Talk about tedious.
2. I purchased cardstock and, after cutting down part of our invitation design, made our RSVP cards, registry information cards and map & directions cards. We printed these out and cut them down to size also.
3. I found some mailing envelopes that we both absolutely adored at www.paper-source.com. That is also where I found our RSVP envelopes. My FI preferred the "lined envelope" loop vs. the "traditional 2 envelope" look, so I also picked up some envelope liners in our Mossy Green color. These would've been really easy to make, but honestly, for the price it was worth the time to just put them together. FI and his cousin assembled the envelopes while FMIL and I hemmed all of the hankies. If these had been pre-hemmed, they wouldn't have fit in the printer.
4. My Mom and I put our love for cross-stitching to good use as we embroidered some slight embellishments on the invitations. Literally, we started with a sheet of white fabric. All the color and additional aspects on it were either made by printer ink or embroidery thread.
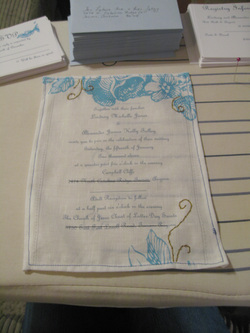
a finished invitation. please excuse the black lines; we are on the www after all
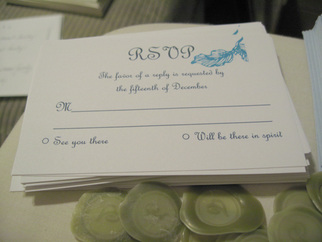
our RSVP cards
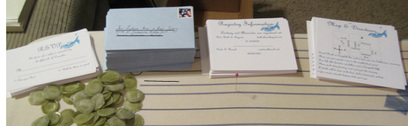
L-R: rsvp cards, rsvp envelope, registry info, map & directions
5. Since we used a fairly unconventional format for our invitations, I had to figure out an elegant presentation method. I decided to stack the cards (they are tiered, so each card sticks out a little further than the one on top of it so you can see the headings of all of them when you hold them in a stack), wrap the invitation around them and wrap a length of ribbon around that. To bring the whole thing together, I decided to use wax seals to essentially "seal" the deal. ha!
6. I found a beautiful seal press at Michael's but had a hell of a time using the wax they had there. Then I heard about glue gun wax sticks! WHAT!? Amazing. And incredibly simple. These sticks of wax feed into your glue gun just the same as glue sticks. You will need a low heat gun to make a decent presentation. I couldn't find these wax sticks anywhere in town, but the internet is crowded with them: ebay, and etc. Just google it. I was so surprised! I decided to get mine from paper-source since I had already received some of their supplies in "moss green" and knew that their color scheme matched my own expectations of what moss green is. I let loose by preparing the seals first on wax paper, peeled them up and then secured them to the face of the ribbon on the front of our invitations with glue dots (you can get these at any craft store that does scrapbooking). hint: I recommend letting the seal cool for only a bit and peeling them up while they're still a tad warm. They peel so much easier that way.
6. I found a beautiful seal press at Michael's but had a hell of a time using the wax they had there. Then I heard about glue gun wax sticks! WHAT!? Amazing. And incredibly simple. These sticks of wax feed into your glue gun just the same as glue sticks. You will need a low heat gun to make a decent presentation. I couldn't find these wax sticks anywhere in town, but the internet is crowded with them: ebay, and etc. Just google it. I was so surprised! I decided to get mine from paper-source since I had already received some of their supplies in "moss green" and knew that their color scheme matched my own expectations of what moss green is. I let loose by preparing the seals first on wax paper, peeled them up and then secured them to the face of the ribbon on the front of our invitations with glue dots (you can get these at any craft store that does scrapbooking). hint: I recommend letting the seal cool for only a bit and peeling them up while they're still a tad warm. They peel so much easier that way.
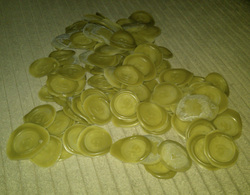
a hefty pile of prepared wax seals
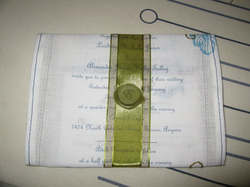
A finished version of our beautiful invitations. It was a lot of hard work but totally worth it!

Let's get these babies in the mail
